SHAPED PAINTING: Finished Green Underpainting
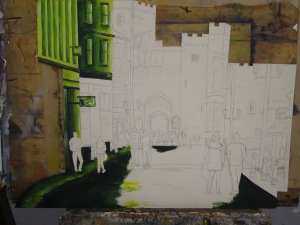
Posted: March 7, 2014 Filed under: Documentation, Field | Tags: Acrylic Paint, Art, Art Student, artist, cut out shaped piece, green, green ground, green underpainting, paint, painting, shaped painting, tonal variation, tone, underlay, workshop work Leave a commentI have now finished the green under-painting I have been working on this week, ready to paint the shaped painting on Monday afternoon in the paint workshop.

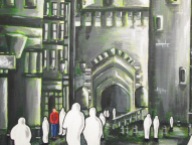
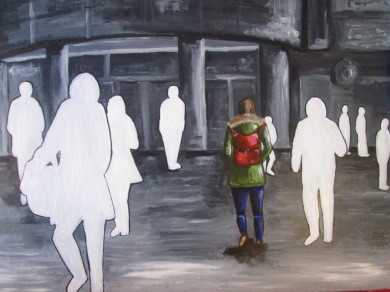
I have linked my shaped painting into my Hidden loneliness project and painted all the people as white silhouettes apart from one, to show that the one person may as well be alone because there is no interaction with any of the other people around them, they may as well not exist. I feel this heightens loneliness, but this green under-painting has proved to me that colour is very important when portraying loneliness, because I would say this figure looks lonely than in the pieces I have painted in dark and sepia tones.
I am really pleased with the result, I focused on creating tone and highlights and shadows and I feel as if this is definitely evident and I am confident that this underlay with inform the final outcome greatly.
SHAPED PAINTING: Working on Green Under-Painting
Posted: March 4, 2014 Filed under: Documentation, Field | Tags: Acrylic Paint, Art, Art Student, artist, city loneliness, city scape, experimentation, Fine Art, green, green ground, green underpainting, highlights, loneliness, paint, painting, shadows, tonal variation, tone, tones of green, underpainting, workshop work Leave a commentI have started working on the green under-painting of my shaped piece that I started in Mondays paint workshop. When I previously produced a green under-painting of a still life, I found that the tones I had worked with in the green underlay really informed the shadows and highlights that I painted when rendering the top coat. I found that I produced a far more three-dimensional and tonal outcome and that it was easier and quicker to do as I had already thought about tonal variation in the under-painting.
In this shaped piece, I am taking more time on the under-painting and focusing on achieving dimension and tone within it. Also, I was really surprised by how well the green showed through my work when applying the top layer with a method of dry brushing and so this is something I will be working with again. I will document the progress of this painting and work hard to create a highly successful outcome portraying the hidden loneliness of the city. I will incorporate the white silhouette imagery I have been working with into this piece and work at creating a visually successful piece. I have never made a shaped painting, but I can see how it is going to make for an interesting outcome already. I am really enjoying the paint sessions and have already learnt many valuable skills that I have already started applying in my project work.
PAINT WORKSHOP: Underpainting Finished
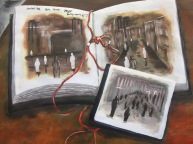
Posted: February 21, 2014 Filed under: Documentation, Field | Tags: A1, Acrylic Paint, Art, art skill, Art Student, artist, field, Fine Art, fine artist, green, green still life, green study, green tones, green underpainting, grounds, headphones, manifesto, paint workshop, painting, painting ground, painting workshop, ready to paint on top, sketchbook, Still life, underpainting, Workshop Leave a commentToday, I spent the afternoon working in my studio and finishing off the underpainting I started in the painting workshop on monday. There are many green tones used to make up this underpainting of a still life of my book, photograph and headphones. They are darkened with red and blue and lightened with yellow and white. It is now ready for the next layer of paint, which I will be embarking on in next Mondays painting session.
I am intrigued to see how the underpainting affects the final result of the piece and if and how the green tones beneath the colours that I apply on top change them at all. I am also excited to see whether the green ends up showing through the painting in any way and if the highlights and shadows that I have already created in the underpainting, inform the highlights and shadows I apply in the next layer.
I must admit that I don’t usually underpaint when producing artwork, I tend to just go for it on a white canvas or piece of board or paper. It is great that I am learning a new technique and I look forward to applying the skills and knowledge that I learn to the work I am producing in my City Project.
Painting Workshop: Session 1: Underpainting
Posted: February 17, 2014 Filed under: Documentation, Field | Tags: Acrylic Paint, Art, Art Student, artist, Arts, Artwork, city, documentation, field, Fine Art, green, green tones, grounds, layering paint, layers, paint, paint workshop, painting, Still life, underpainting, Visual Arts, Workshop Leave a commentToday, I attended a painting workshop with James Green. I was asked to bring a drawing, a photograph and an object, all relating to my city project. I didn’t know what to expect and was excited to see what we were doing with these items. When I arrived, I was asked to set up a still life using the things I had brought. I included my sketchbook, a photo I had taken highlighting the hidden loneliness of the city and some headphones. I was really stumped and couldn’t think of what object I was going to take so I put in my headphones and started listening to music, it dawned on me that people wear headphones on the streets and on public transport to avoid the loneliness around them so they seemed like an appropriate item to bring along. I arranged my things and set up my still life and started making a really lose, quick and basic 5 minute sketch of it.
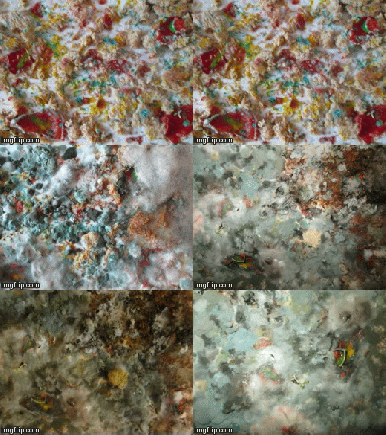
After this we talked about the task of the work shop and what we aimed to do. We talked about underpainting and how it is important. This obviously linked in with the grounds workshop that I took part in last week. We looked at the work of Simon Ling and how the underpainting that you do can show through the final outcome. You can see the orange underpainting coming through the untitled piece I have included below by Simon Ling and I think this is a highly interesting effect. We talked about the fact that underpainting is not typically considered by art students and that it can completely change the feel, complexity and outcome of a painting.
The tutor showed us some of his work built upon the foundations of layers and layers of underpainting and the outcomes were incredibly inspiring, there looked to have been so much work put into the pieces and the under colours had created new colours on top. It really interests me that the under colours inform the top colours and can change the way a colour looks. He gave an example of a tube of yellow paint that he had used in two different places within his work, it was the same tube of paint, but one part was painted over a white underpainting and the other over a blue underpainting, the results were completely different. We discussed edging and how we could move the edge of a paintbrush back and fore across a page to create a straight line, I used this technique when rendering the corners of the book within my work below.
We were given that task of using only Green tones to create an underpainting of our Still life set ups.
Using only tones of Green we had to pick up on light and shadow and create a variety of tone within our underpaintings, ready to paint on top of them in the next session next week. We were only allowed to use five colours and no black was to be used to darken our greens. We used yellow and white to lighten the green and blue and red to darken it.
It was really interesting painting the different tones and highlights all in one colour. We only had two hours to complete this workshop, and I didn’t quite finish my underpainting, so I will be working on it this week ready for next weeks session. I was happy with the result of my underpainting and I think I have a good tonal range within it, however I do think that the book looks a little flat in places and I rushed a little so some of the angles within the piece are a bit wrong, which is something I will work on. I am excited to see what this painting will look like next week when I start adding more colour on top. I wonder how the green will change the colours I use? Will it show through in places? There seems to be endless possibilities when layering paint and I am intrigued to explore this.










Recent Comments